Monday, December 31, 2012
One more "Last post for 2012"!
Sunday, December 30, 2012
A final post for 2012
This past month has flown by so quickly - maybe because I was so "unready" for most of it to happen... It seems like every time I check the calendar, it's at least 3 days later than I think it should be - and now there's only 1 day left!
I FINALLY got some time to work on my latest MysteryQuilt4Military - the mystery actually concluded a few weeks ago, but it seems that quite a few of the ladies are having a difficult time keeping up with the mystery this time, so I'm in good company! I also decided to make 2 of these quilts before I actually saw the pattern, so, I'm behind twice as badly! Here are my fabrics - first is a soft teal; a cream solid and then a darker teal; the second colourway is a deep-ish green, white and red fabrics. I really have no blocks put together yet to give you an idea of what this pattern will look like.

 I also signed up to do an online mystery quilt on New Year's day - it requires a jelly roll and a coordinating fabric. I should have pics on Tues. or Wed. I also managed to make a Secret Santa gift for one of my online quilting-forum friends:

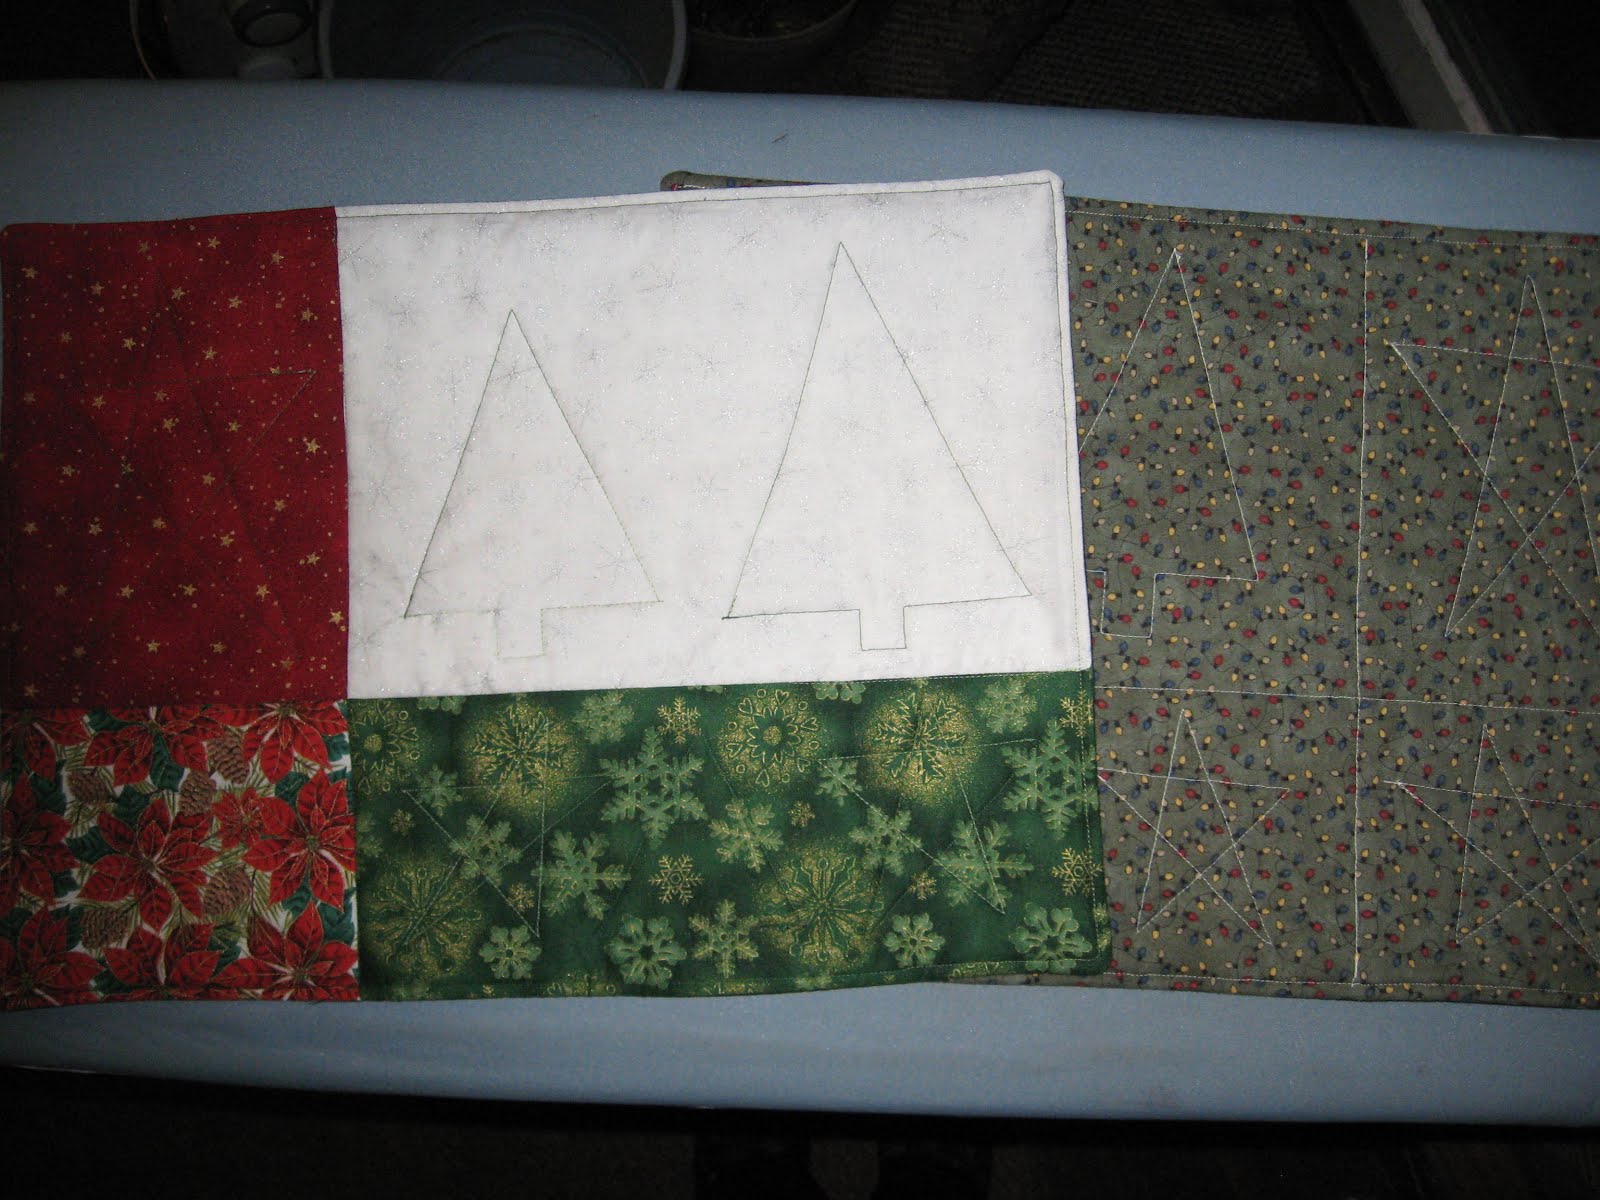
 The trees are probably more appropriate for the Christmas season; the little fabric dish can be used year-round.
I also made and mailed a bunch of Christmas cards (forgot to get pics of most of them); and I knit slippers for our SIL for Christmas. Each of us drew a name of a family member - we then had to make a gift for that person; AND, I made 3 kinds of Christmas cookies, and one kind of fudge for our neighbours and a few friends...
So, it's obvious why I always seemed to be behind!
Maybe I should resolve to do a little better in the blogging department for the new year - at least, I'll try to do better!
The trees are probably more appropriate for the Christmas season; the little fabric dish can be used year-round.
I also made and mailed a bunch of Christmas cards (forgot to get pics of most of them); and I knit slippers for our SIL for Christmas. Each of us drew a name of a family member - we then had to make a gift for that person; AND, I made 3 kinds of Christmas cookies, and one kind of fudge for our neighbours and a few friends...
So, it's obvious why I always seemed to be behind!
Maybe I should resolve to do a little better in the blogging department for the new year - at least, I'll try to do better!


Monday, December 17, 2012
Birthday cards!
We seem to have a number of family birthdays in December - so, while everyone else is making Christmas cards, I'm making birthday cards. Once again, Pinterest has been a big help in finding great ideas for cards - look at these 2 cards:
 The card on the left is really easy, especially if you have one of the little paper packs that have a whole line of paper in it - the paper all coordinates! (I'm pretty sure that this paper is from Basic Grey.) I used 4 different sizes of circle punches to get a nice assortment of circles, which I then randomly glued to the left side of the card. All that it needed then was a sentiment: I used the "Happy Happy Birthday" one from an old sentiment assortment from Stampin' Up. (It may be the first time I've used that particular stamp!)
The card on the right has some designer paper glued on the card base; then I cut 2 sizes of labels using the Labels 4 Nestabilities die from Spellbinders. I embossed the white C/S with a section of an SU floral embossing folder. I added brown "pearls" to the flower centers, and finished the label with a few butterflies from a Sizzlets die. A bit of sheer ribbon and a sentiment finished the card off.
I have some more Christmas cards to make yet - I'm hoping to have the cards all sent out tonight or tomorrow - and then I might have some time to work on a quilting project (or 8...!) I signed up to do a mystery quilt that will be going to a wounded serviceman/woman - the final clue was just released on Friday; I signed up to do a New Year's Day mystery too, AND I need to prepare a tutorial for our January quilt guild meeting. Maybe I should post this and get started on those extra Christmas cards!
The card on the left is really easy, especially if you have one of the little paper packs that have a whole line of paper in it - the paper all coordinates! (I'm pretty sure that this paper is from Basic Grey.) I used 4 different sizes of circle punches to get a nice assortment of circles, which I then randomly glued to the left side of the card. All that it needed then was a sentiment: I used the "Happy Happy Birthday" one from an old sentiment assortment from Stampin' Up. (It may be the first time I've used that particular stamp!)
The card on the right has some designer paper glued on the card base; then I cut 2 sizes of labels using the Labels 4 Nestabilities die from Spellbinders. I embossed the white C/S with a section of an SU floral embossing folder. I added brown "pearls" to the flower centers, and finished the label with a few butterflies from a Sizzlets die. A bit of sheer ribbon and a sentiment finished the card off.
I have some more Christmas cards to make yet - I'm hoping to have the cards all sent out tonight or tomorrow - and then I might have some time to work on a quilting project (or 8...!) I signed up to do a mystery quilt that will be going to a wounded serviceman/woman - the final clue was just released on Friday; I signed up to do a New Year's Day mystery too, AND I need to prepare a tutorial for our January quilt guild meeting. Maybe I should post this and get started on those extra Christmas cards!

Tuesday, November 27, 2012
I LOVE Pinterest!!
Have you heard of Pinterest? If not, where have you been? It has to be the best time-waster resource for any, and all kinds of crafts. (Go check it out, NOW - I'll wait for you!) The absolute best part about it is that many of the pictures have tutorials connected to them.
I love it for quilting and card-making ideas - and I have enough of each of them to keep me busy until I'm 135 years old!
Today I'm going to share 2 of my Christmas cards, completely CASE'd* from Pinterest. The first one is fairly simple and easy to duplicate. It uses a Stampin' Up Christmas set (Snow Swirled) from a few years ago:
 The second card is based on a card using a Papertrey Ink stamp set. Fortunately, Close to my Heart has a similar stamp set (Glory to God), and it's the one I purchased just a few weeks ago, specifically to make this card:
 The second card is very labour-intensive, and I won't be making too many of them. Don't worry, you'll still be getting a lovely card from me!
I'll be back in a few days, to share some of the things I'm making for Christmas gifts.
*CASE = Copy And Share Everything.
The second card is very labour-intensive, and I won't be making too many of them. Don't worry, you'll still be getting a lovely card from me!
I'll be back in a few days, to share some of the things I'm making for Christmas gifts.
*CASE = Copy And Share Everything.


Saturday, November 17, 2012
November FNSI
I can hardly believe that it's the 17th of November - where has this month gone so quickly? There's nothing like the monthly Friday Night Sew-In to remind me that time's a-flyin'!
I missed a few FNSIs in the past few months, and that fact inspired me to be more motivated this time - and once I've signed up, I hate to spend the night doing anything but sewing. Last night was a good night to get some work done on one of my latest mysteries - this one (Mystery Quilt by e-mail) is sponsored by Heather Spence (http://www.heatherspencedesigns.com/mystery-quilt/), and is benefitting a little boy and his family as he battles cancer. You pay $15. to be part of the mystery - $5. goes for costs involved with the mystery and the balance goes to the family of the little boy. There are 2 versions of this quilt too - you can choose the level of difficulty that you're most comfortable with.
The parts of this mystery have all been released now, but I'm a "wee" bit behind, and didn't have much accomplished in the piecing department. When I quit sewing last night, I finally had the quilt center done (although I'm considering making it one row longer) - other than that, all that's left to do is the 4 borders; then layer it, quilt it and bind it. Once it's done, I'll have to decide who will be getting it too - volunteers, anyone? Just kidding!
Here's what I have accomplished so far:
 I'm hoping to have the top done by the end of next week - check back then to see the quilt top finished.

Monday, November 12, 2012
Christmas placemats
Our quilt guild was recently asked to make placemats for an annual Christmas dinner for area seniors. One of the local service groups hosts the event, donating the food and staff. They asked if our guild would mind making / donating placemats for the seniors to use for the dinner; they would then be able to take them home to use for their own Christmas meal.
When we were asked to participate, we immediately agreed to help out - it worked out that each guild member needed to make between 5-8 placemats. We were free to choose our own design; the table linens would be red or green, so we were asked to incorporate those colours as well.
One of my quilting friends had recently shown some placemats on our quilt forum, and I liked the design concept - the placemat was divided into 4 sections, each one made of a different fabric. I chose to use all Christmas / winter fabrics, and quilted the placemats with traditional shapes - stars and Christmas trees.
The pic is of two of the placemats - one from the front so you can see the fabrics and design, the other one is from the back, to see the quilting. I had a picture in my mind of how I wanted the quilting to look - and it ended up being pretty close! I had the backing fabric in my stash for about 7 years - it's not often that you need green cotton with a design of strings of Christmas lights, but it was the perfect finishing touch!

Saturday, November 10, 2012
Superstorm Sandy
We've all seen the horrible destruction in the wake of Superstorm Sandy - and more than one person has wondered what they could do to help. Thankfully, a number of quilters have banded together and are making quilts for as many people as they can. One website offered a fairly simple block and asked us to sign up for as many as we thought we could reasonably make. Of course, there's also a time limit, so the blocks have to be received by Nov. 25th. Any time I've sent things to the U.S., it seems to take at least a week and a half (although Canada Post doesn't seem to be doing a really wonderful job either lately...!). Well, I've pulled some bright fabrics from my stash, because if you're facing what some of those folks are facing, you need a little bright, right? All of the blocks needed to be white, with one other fabric - it didn't matter if it was solid or print. I went with some fun fabrics, and some pretty fabrics, and, well, I'll just show you a picture!
 There are 12 altogether - I could get enough white blocks out of 2 strips of the white fabric to make 12 blocks, and I have LOTS of stash fabric, so that's why I made 12 (I signed up for 5). They went out this morning, so I hope to hear from the quilter in about 2 weeks that they've arrived. It's such a small gesture, but it adds up!
Here's a link to the original post, in case you can help out too - even one block helps! http://www.knotted-thread.com/2012/11/helpless.html
There are 12 altogether - I could get enough white blocks out of 2 strips of the white fabric to make 12 blocks, and I have LOTS of stash fabric, so that's why I made 12 (I signed up for 5). They went out this morning, so I hope to hear from the quilter in about 2 weeks that they've arrived. It's such a small gesture, but it adds up!
Here's a link to the original post, in case you can help out too - even one block helps! http://www.knotted-thread.com/2012/11/helpless.html

Sunday, October 14, 2012
National Card-making day (belatedly...)
I know, I know, National Card-making Day was Oct. 6th... So, I'm a little late with this post, but I have a good excuse - Thanksgiving day (Mon. Oct. 8th). We had the whole family home, plus my dad. We had a wonderful time celebrating God's goodness to us through the past year*; we shed a few tears remembering that mom was with us last year, and we heard about our son's recent mission trip to Malawi, Africa. With Thanksgiving comes a lot of house cleaning, cooking fancy food and all the rest of the "prep" that goes with a feast-day.
I did make a point of sneaking out on Saturday to visit my "local" stamping store - I made a cute gift tag, which I can't share here, because one of the people that reads my blog will be getting it. But, I went home and made a few cards to celebrate, and here they are, thanks to Pinterest:

 For the birthday card, I took an embossed panel I had in my stash; it needed to be trimmed down a bit, and then was glued to the card front panel. I added a bit of ribbon from the dollar bin at Michael's, a punched flower with a brad to keep it attached to the card. A sentiment (again from Michael's), stamped across the bottom completed that card. The sympathy card was also a Pinterest inspiration - I embossed a panel and brayered it with Sahara Sand ink. I punched out a section, and emphasized it with a scalloped edge - I didn't use the brayer here to make it stand out a bit. Then I stamped the hummingbird (from Pretty Amazing) onto the card; I stamped the accompanying flower, cut it out and popped it up.
These cards are ready to go out in the mail tomorrow.
* I'm so thankful for my family, my quilting, blogging, and card-making friends, and my relationship with the greatest gift I've ever been given - Jesus!
For the birthday card, I took an embossed panel I had in my stash; it needed to be trimmed down a bit, and then was glued to the card front panel. I added a bit of ribbon from the dollar bin at Michael's, a punched flower with a brad to keep it attached to the card. A sentiment (again from Michael's), stamped across the bottom completed that card. The sympathy card was also a Pinterest inspiration - I embossed a panel and brayered it with Sahara Sand ink. I punched out a section, and emphasized it with a scalloped edge - I didn't use the brayer here to make it stand out a bit. Then I stamped the hummingbird (from Pretty Amazing) onto the card; I stamped the accompanying flower, cut it out and popped it up.
These cards are ready to go out in the mail tomorrow.
* I'm so thankful for my family, my quilting, blogging, and card-making friends, and my relationship with the greatest gift I've ever been given - Jesus!


Friday, September 28, 2012
A Card, Finally!
The name of my blog is Quilting and Cardmaking, but there haven't been a lot of cards posted lately - mostly because I just haven't had a lot of time to make cards in quite a while. What's that? You think that it only takes a few minutes to make a card? Right... That's what I used to think too!
Anyway, I've made you wait long enough - here's a card for you:
 I know that this was a CASE from someone's blog - but I can't find the blog post right now, so maybe I'll just thank every card-maker that's willing to share her talents!
The Designer Paper is from Stampin' Up from at least a year or two ago; the sentiment is from Stampin' Up (Trust God) and the leaves and flowers are cut using Spellbinders dies (Mega Carnation Creations and Shape Foliage).
Thanks for stopping by!
I know that this was a CASE from someone's blog - but I can't find the blog post right now, so maybe I'll just thank every card-maker that's willing to share her talents!
The Designer Paper is from Stampin' Up from at least a year or two ago; the sentiment is from Stampin' Up (Trust God) and the leaves and flowers are cut using Spellbinders dies (Mega Carnation Creations and Shape Foliage).
Thanks for stopping by!

Saturday, September 22, 2012
It's official! Friday Night Sew-In results too!
It's official - fall is here! I'm not a huge fan of the cold, rainy weather that seems to characterize fall, but a day like today is just fine with me! It's also Fall Fair season - otherwise known as "finishing up six projects in time to enter them in the fair" season. Well, I managed to finish a few of those things - and the project that didn't get done became my project for last night's Friday Night Sew-In.
I'm not a big fan of decorating my house for every season, but I do like some seasonal items - and Christmas is one of the times when I do spend a bit of time decorating. The fact that I can create items that can be entered into the "fall fair" and possibly win prize money for, just sweetens the pot - and that's the story of my Christmas table runner. I managed to start it last year, but it didn't get even close to being completed, so I stuck it in a box and forgot about it. I found it back 3 days ago while I was looking for the quilt top I wanted to enter in the fair. I caught a glimpse of the red fabrics, and I remembered starting it - but the question then became "Is it close enough to being finished so I can enter it on Friday?" (this was on Wednesday...) No way! Sigh.... But, there's one more fair next week - I can try for that! So, the quilting is finally done, the binding is attached, and I even managed to get about half of the binding sewn down - and I have a few days left before Friday's entry date!
 I still have an hour or so to work on it - that should be enough to finish it up. I need to cook supper first though - and later I'll check in to see what others have done.

Tuesday, September 18, 2012
I'm still here!
Why is it, that you get up in the morning, and you think of all the spare time you have in the day; and suddenly, it's supper time, and all of your grand and glorious plans have come to nothing?! Welcome to my world!
I have been getting things accomplished - just not the sorts of things that you want to read about...
But wait, I did make a card! I think that I might even have a picture of it - and this just might be it:
 An older couple at our church is going through a really tough time right now, and I wanted them to know that we care about them and we're praying for them.
I know that I saw a card on someone's blog that ended up being the inspiration for this card, but right now, I have no idea who it was (I'm going to have to start paying more attention to that - and for now, I'll accept my punishment of 20 lashes with a wet noodle). I'm not a huge fan of the colour orange, but it just seemed right for this card. I used my Beautiful Wings Embosslits from Stampin' Up - I made some of the butterflies with the orange cardstock, and a few with cardstock-weight vellum. The horizontal strip is a darker cardstock, and I used the scalloped trim border punch along the long edges. A big circle cut from coordinating designer paper finishes it off.
The card has been delivered, and hopefully, it's encouraging the recipients.
An older couple at our church is going through a really tough time right now, and I wanted them to know that we care about them and we're praying for them.
I know that I saw a card on someone's blog that ended up being the inspiration for this card, but right now, I have no idea who it was (I'm going to have to start paying more attention to that - and for now, I'll accept my punishment of 20 lashes with a wet noodle). I'm not a huge fan of the colour orange, but it just seemed right for this card. I used my Beautiful Wings Embosslits from Stampin' Up - I made some of the butterflies with the orange cardstock, and a few with cardstock-weight vellum. The horizontal strip is a darker cardstock, and I used the scalloped trim border punch along the long edges. A big circle cut from coordinating designer paper finishes it off.
The card has been delivered, and hopefully, it's encouraging the recipients.

Monday, August 27, 2012
A finish!
I don't often get a quilt done as quickly as Ava's quilt, but I didn't have a lot of time! We attended her baptismal service yesterday morning, and the completed quilt came with us. Having a sewing machine that can easily handle the quilting on a quilt up to at least a queen sized quilt makes the job much easier!
So, here it is:
 This quilt is meant to be played with, dragged around and probably spilled on too, so I stitched the binding on and then machine stitched it down on the back just to give it a little more strength. Each block is different, and I included a note with ideas of how to use it - younger children can simply find any specific block (zebras or cars, etc.); as they grow older, the search can be for a concept - for example, something that reminds you of summer (sea shells). I hope that Ava will someday have a brother or sister to share this quilt with, but for now, it's her's alone - and there's a block with different letters of the alphabet on it, including the letters A, v and a!

Saturday, August 18, 2012
I'm finally posting what I did last night!!
Alright, where to start? Last night (Fri. Aug. 17th) was the August Friday Night Sew-In, AND the deadline to finish one of my current projects. When I signed up for this month's FNSI, I was asked to indicate what I was hoping to accomplish, and I commented that I had lots of things to work on, including my Quilt of Valor mystery quilt....
A while back, I saw a picture of a great quilt - and I tried and tried to find out what the pattern was, so that I could make it. I finally found out that it was a QOV quilt, one of many that had been offered online as a mystery quilt. One thing led to another, and I ended up signing on to make a QOV. This is the second one that I've done this year (One of these days I'll share the other one here).
So, I'll start with my mystery quilt - we had 2 weeks to complete the last step, and I really needed every minute of it. I'm still working through my mom's death, and, with a few family members, helping dad through it as well, so planning sewing time has been kind of hit and miss. Added to that is the christening of the baby of one of my son's friends - and we can't go to that without a gift!
 SO, it was finally Friday night - and I grabbed my mystery quilt, and some fabrics for baby Ava's quilt. I had the body of the mystery quilt done, although I made it a bit bigger; I needed to make up the border and attach it. To make the star points for the quilt, we had the option of using whatever method we chose, and I picked the method that yields bonus triangle units. I later took those off-cuts, and joined them for the border (and I threw in a surprise or two!) I can check that project off the to-do list (now I have a few weeks to get it quilted....).
The other project is an "I Spy" quilt for baby Ava. She's a bit too young to fully appreciate it now, but it will make a great gift in the years ahead, as she realizes all the different things that she can find. An I Spy quilt usually has all sorts of images on it - some have doubles of every image, some only one. The game can be as simple or complicated as the player (or parent) makes it. I chose to make each picture different, but many of them are themed ( for example, a number of blocks have stars; others have animals) - so at first she can find all the blocks with animals; as she grows older, it can be narrowed down to black and white animals (cows, zebras, pandas, etc.). And, it can be passed down from one child to the next.
I spent a large part of my time last evening cutting images for the quilt, and also strips for the "checkerboard" that separated the blocks from each other. The pattern is based on the one on Bonnie Hunter's Quiltville site. I only managed to sew a few of the offset checkered squares - more strips have been sewn, but assembling them is my job for Monday - did I mention that I need to have the quilt done so I can give it to her parents on Sunday? Guess there won't be any sleeping in next week! Here's a picture of some of the featured pictures, and also the checkered squares that will keep them apart.
SO, it was finally Friday night - and I grabbed my mystery quilt, and some fabrics for baby Ava's quilt. I had the body of the mystery quilt done, although I made it a bit bigger; I needed to make up the border and attach it. To make the star points for the quilt, we had the option of using whatever method we chose, and I picked the method that yields bonus triangle units. I later took those off-cuts, and joined them for the border (and I threw in a surprise or two!) I can check that project off the to-do list (now I have a few weeks to get it quilted....).
The other project is an "I Spy" quilt for baby Ava. She's a bit too young to fully appreciate it now, but it will make a great gift in the years ahead, as she realizes all the different things that she can find. An I Spy quilt usually has all sorts of images on it - some have doubles of every image, some only one. The game can be as simple or complicated as the player (or parent) makes it. I chose to make each picture different, but many of them are themed ( for example, a number of blocks have stars; others have animals) - so at first she can find all the blocks with animals; as she grows older, it can be narrowed down to black and white animals (cows, zebras, pandas, etc.). And, it can be passed down from one child to the next.
I spent a large part of my time last evening cutting images for the quilt, and also strips for the "checkerboard" that separated the blocks from each other. The pattern is based on the one on Bonnie Hunter's Quiltville site. I only managed to sew a few of the offset checkered squares - more strips have been sewn, but assembling them is my job for Monday - did I mention that I need to have the quilt done so I can give it to her parents on Sunday? Guess there won't be any sleeping in next week! Here's a picture of some of the featured pictures, and also the checkered squares that will keep them apart.
 Well, it looks like this is going to be a busy week! Thanks for your encouragement and comments.


Tuesday, August 14, 2012
Little quilts!
Every summer, I make myself a new miniature quilt. It's something that I've done about 6 or 7 times now, and I really enjoy making them. Making a tiny quilt like this is a lot of fun, and you get to see if you're going to like the quilt before you actually have to commit to making the full-sized version of it. Part of the challenge is making each of the sides shorter than 12"!
I spent an afternoon at Cathy's house for a sewing afternoon again last week, and one of the things that I worked on was this little mini quilt:
 The pieced blocks are "Darting Birds" blocks, and all of the pieces for the 5 pieced blocks came from the off-cuts from a Quilts of Valor quilt that I'm working on (I'll post a picture of it in the next day or two...)
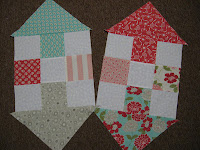
The other thing that I worked on was cutting blocks for a baby quilt that I wanted to make. I saw a picture of the quilt online, and studied it for a few minutes, until I thought that I could figure out how to make the quilt. (It was actually a silly thing to do, because the instructions were included with the picture - I just hadn't noticed them). I got the top completely pieced in a day and a half, which isn't a big deal, because the quilt is only crib-sized. I don't really need it right now, but it's probably a good idea to have one done, just in case I need a baby quilt for a gift some day. It's completely put together; just needs to be layered, quilted and bound. (I just now noticed 2 of the same block positioned with just one block between them - so, once this post goes up, I'll be grabbing the seam ripper...) Argh!
The pieced blocks are "Darting Birds" blocks, and all of the pieces for the 5 pieced blocks came from the off-cuts from a Quilts of Valor quilt that I'm working on (I'll post a picture of it in the next day or two...)
The other thing that I worked on was cutting blocks for a baby quilt that I wanted to make. I saw a picture of the quilt online, and studied it for a few minutes, until I thought that I could figure out how to make the quilt. (It was actually a silly thing to do, because the instructions were included with the picture - I just hadn't noticed them). I got the top completely pieced in a day and a half, which isn't a big deal, because the quilt is only crib-sized. I don't really need it right now, but it's probably a good idea to have one done, just in case I need a baby quilt for a gift some day. It's completely put together; just needs to be layered, quilted and bound. (I just now noticed 2 of the same block positioned with just one block between them - so, once this post goes up, I'll be grabbing the seam ripper...) Argh!
 This coming Friday evening is August's "Friday Night Sew-In" - and, as always, I have more than enough PhD's* to choose from! You'll have to check back here Sat. evening to see which one I worked on!
(*Projects Half-Done)
This coming Friday evening is August's "Friday Night Sew-In" - and, as always, I have more than enough PhD's* to choose from! You'll have to check back here Sat. evening to see which one I worked on!
(*Projects Half-Done)


Saturday, August 11, 2012
Does anyone like making sympathy cards???
I know that I sure don't! (although when you're on the receiving end, it's nice to know that someone cares...). We've just had 2 deaths in a week in our church family, which meant that I needed to come up with a few new cards. It helps that I just got the new Serene Silhouettes stamp set from Stampin' Up.
The other SU set that I love is Thoughts and Prayers - it's so appropriate for a number of occasions. I go back to it for sympathy cards over and over - and there are so many different ways to use it. So... here are the 2 cards that came out of that card-making session - first the Thoughts and Prayers card:
 I used a striped designer paper and some cardstock that I punched with a scalloped edge - add that to the stamped design and sentiment, round off the bottom corners, and it's done.
The second card used the Serene Silhouettes stamp - I used my markers to colour the image, using the green ink to match the cardstock. I embossed the outer edge of the card, and stamped a vanilla panel with the French Script background stamp (using Sahara Sand ink). I mounted the small image on another piece of green C/S, added brads to the top corners, and mounted it on the center of the card. This is what it looked like:
I used a striped designer paper and some cardstock that I punched with a scalloped edge - add that to the stamped design and sentiment, round off the bottom corners, and it's done.
The second card used the Serene Silhouettes stamp - I used my markers to colour the image, using the green ink to match the cardstock. I embossed the outer edge of the card, and stamped a vanilla panel with the French Script background stamp (using Sahara Sand ink). I mounted the small image on another piece of green C/S, added brads to the top corners, and mounted it on the center of the card. This is what it looked like:
 Thanks for stopping in!


Sunday, July 29, 2012
FINISHED!
I FINALLY finished my Disappearing 9-Patch variation quilt!
Just before my mother passed away, she blessed each of us with a cheque - we were to use it for something that would remind us of her. My first thought was of mom's giving - she graciously and generously gave of her time and talents. I have a few quilts that will be going to new homes sometime soon, but I needed to quilt them before I could give them away. I'm having more and more trouble trying to quilt anything larger than a table runner on my Janome, so I checked out "the competition" - and I found a great offer from Pfaff. Pfaff is celebrating their 150th anniversary this year, and have brought out 2 special models. I bought the Expression 150, and initiated it on this quilt.
I had seen pictures of a spiky quilt pattern that alternates from "up and down" to "side to side" as you progress from one block to the next, and I used it for my first quilting project.
I'm pretty happy with the results! (I even made and applied a quilt label!) The quilt was completed in time to present to the new owners of the quilt - the family that our son is living with. They have been over-the-top with their generosity - giving our son a place to live while he did his internship; he's still living with them 7 months later! Also, they sent all sorts of edible goodies after mom's death - and Rachel knows how to prepare food!
Our son had been asked to preach in his "home" church today; he invited us to share the experience with him, so we did! It also gave us the perfect opportunity to hand over the quilt to the Guthrie family! Have a quick peek at the completed project:(a general pic of the quilt, and then a closer look at the quilting)


Friday, July 20, 2012
Another start!
Yes, I do have finishes too - it's just that there seem to be so many more starts.... and I sometimes forget to post the completed quilt. I'll try to change that.
A while back, as I was reading the blog of another quilter*, I realized that some of the things she was chatting about sounded VERY familiar. I contacted her, and sure enough - Cathy lives in the city nearest me, and we have a LOT in common! Trying to make a long story short, we agreed to meet one day; we did, and hit it off almost immediately. Four hours passed VERY quickly; at the end of the afternoon, Cathy proposed we get together for a sewing day - so, this past Tuesday, I ventured into the city, and spent a very enjoyable few hours sewing with her!
I thought that it would probably be easier to take a new quilting project with me; so, I gathered up my my new Schnibbles pattern; the 2 Vintage Modern layer cakes called for in the pattern; I cut them, and my B/G fabric as directed, and headed off. I managed to get most of the 9-patch blocks put together, pressed, and ready to add the triangles. Needless to say, Cathy and I spent a fair bit of time chatting too, but we each managed to achieve a fair bit of our projects.
 Yesterday, I started adding the top and bottom triangles, and am now working on adding the side triangles. A bit of a trim will be needed, and then the fun of laying these big blocks out will begin!
 Check back here soon - I just might have some surprises to show you!
*I'd include the link to Cathy's blog, but I still can't figure out how to do it. Where are my kids when I need them? LOL
Check back here soon - I just might have some surprises to show you!
*I'd include the link to Cathy's blog, but I still can't figure out how to do it. Where are my kids when I need them? LOL


Saturday, July 14, 2012
...and it's finished!
I was hoping to get the quilt top done today, and I managed to accomplish that goal! Thanks to my hubby, who cooked dinner for us so that I could stay at the machine...
I'm not sure where I'm going to go with it from here - I have a lot of the cream blocks yet, so I may cut them in half and sew them together to make a frame around the quilt. If there are enough of them, I may just leave them whole. Of course, I'll have to find them back first!
At any rate, I'm sure you're anxiously awaiting the pic, and here it is:


How can it be July 14th already??
Boy, time flies when you're having fun, doesn't it?! It even seems to fly when you aren't having fun - ask me how I know...
Yesterday was Friday Night Sew-In night - and I was ready for it! I haven't had a chance to do any sewing this week, and I had a quilt project that I was excited about working on. I found a tutorial online for a disappearing 9-patch variation: http://mypatchwork.wordpress.com/2010/10/15/disappearing-9-patch-variation-block-with-charm-squares/
and I had 3 charm packs of Reunion by Sweetwater to use for the blocks, along with a cream-coloured Kona fabric. I got a fair bit accomplished; the blocks are all assembled and pressed, and I laid them out on the floor to figure out the placement.
The problem that you run into when doing scrappy blocks is the final layout - you "can't" have two similar blocks beside each other, and, when there is a definite "up" and "down" to some of the blocks, you can't just turn them 180°...

 I thought I finally had the blocks ready to sew - I picked up 2 at a time, sewed them together, picked up the next two - you get the picture. I had 4 of the 5 rows assembled - and then I found 2 blocks sewn together that should NOT be beside each other. How did I not see that when I laid them out? The fact that it was after midnight might have something to do with it...
So, that was the end of that! I don't know if I have to re-do just that row, or if a bigger tear-out is the answer - but I have all afternoon to sort that out.
Hope everyone else that signed up for the sew-in had a better evening than mine ended up being!
I thought I finally had the blocks ready to sew - I picked up 2 at a time, sewed them together, picked up the next two - you get the picture. I had 4 of the 5 rows assembled - and then I found 2 blocks sewn together that should NOT be beside each other. How did I not see that when I laid them out? The fact that it was after midnight might have something to do with it...
So, that was the end of that! I don't know if I have to re-do just that row, or if a bigger tear-out is the answer - but I have all afternoon to sort that out.
Hope everyone else that signed up for the sew-in had a better evening than mine ended up being!


Sunday, June 24, 2012
My Father's Day card for dad...just a bit belatedly!
For those of you who don't know my dad, he made a living for himself and his family as a carpenter. He's also an avid gardener, and he loves trees - both as part of God's creation, and also as a source for the lumber for the many houses he's built and renovated over the last 30 or more years. He takes great delight in being able to share where each tree on his property came from - and there have been a few unusual ones.
Father's Day 2012 - a little bittersweet - the first day to "celebrate" dad after mom's death. It was tough, and he shed more than a few tears...
Now to the card - I had JUST bought Tim Holtz' woodgrain embossing folder, and I knew it would be perfect for this card. I ran a Close to Cocoa panel through the Cuttlebug with the emb. folder. I love the look it gives! Dad's eyesight is failing somewhat too, so having the raised pattern was an added bonus. I also picked up a simple tree stamp at Michael's a while back, and I stamped it onto a piece of patterned brown DP, and the leafy "canopy" onto a few pieces of green DP. I paper-pieced the green DP onto the trees I'd also cut, and popped the "leaves" up with pop-dots. I also used the pop-dots to lift the trees up off the surface of the card, partly to help dad distinguish the different browns - maybe next year I'll choose a different colour combinations ;-). I stamped the sentiment on green C/S. The card was a big hit!
Here's the finished card:

Saturday, June 16, 2012
Not the most productive evening!
I had such grand plans for last night's Friday Night Sew-In - start sewing early, and sew late. That should have given me at least 6 or 7 hours to sew, right? There's a saying about the "best laid plans of mice and men...", and that sure seemed to be the case last night! First up, I wanted to make a few coasters for a dear friend's special birthday. Her kitchen has an apple theme, and she loves chocolate; I couldn't choose which to go with, so I planned to make 2 sets. Oh, did I tell you that I broke the guide off my 1/4" foot the last time I did some sewing? Yeah... So, last week I finally got into the city so I could buy a replacement. Got it in place and ready to sew - and immediately broke a needle. Replaced the needle, checked my settings - oh look, I had the needle in the wrong position (no wonder the needle broke); change that, try again, break another needle... This isn't the kind of fun I was hoping to have. Turns out that the new foot isn't exactly like the old one, and the needle will ALWAYS hit the foot... so, a trip into the city again is in order.
SO... put the old foot back on, and hope I can get a true 1/4" seam without the guide. The coasters turned out well, and I don't think that the quilt police will be around to check out my seams!
Turns out that my next job didn't need that foot - I finally got some of the centers done for my Scrappy (Dresden) Plate Club quilt that I started back in January - and then I had to check out how well they looked, so I assembled some of the plates as well - and then I realized that it was WELL after midnight, and time to head to bed.
I got a pic of my efforts - the coaster sets are at the top left, completed plates are on the right side, and a few of the centers ready to attach to the plates are bottom left. At this rate, I just might have this quilt finished by next summer!
Thanks for checking in on me!

Thursday, June 14, 2012
It's been a while...
I haven't been here in a while - unfortunately, I don't have much new to share either, apart from a few cards. My mother passed away 2 1/2 weeks ago after a 10 month battle with cancer, and we needed a LOT of thank-you cards for the people that took part in her memorial service or made charitable donations in her name, and especially for all the different nurses, personal support workers and therapists that enabled her to stay at home until the end. We were SO blessed to be able to provide most of her care, with the support of various organizations.
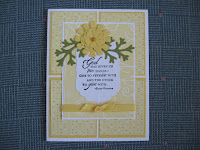
My 3 sisters and I took care of sending out the Thank-you cards - and I'm so glad that I had a tiny card stash! I made both of these cards at workshops - and I usually debate whether or not to put a sentiment on it, or leave it bare until I know what I need the card for. That wasn't an option with the green and yellow card - I didn't have any of the necesary items to create the sentiment section at home. We used a few punches for the flower elements and Smooch for the gold for the letters.  The butterfly card just seemed like a thank-you card when I made it - so that's what the sentiment said. We "inked up" the stamp with Versamark and then dabbed the blue and pink inks over top, before stamping it onto the cardstock - then it got a sprinkling of embossing powder, a shot of heat applied, and voila! a bright and sort-of sparkly butterfly. An embossing folder gave some dimension to the center panel, and a border punch added interest as well.
  I'm hoping to make a dent in my overflowing to-do quilt projects tomorrow night - it's FNSI again!
 The butterfly card just seemed like a thank-you card when I made it - so that's what the sentiment said. We "inked up" the stamp with Versamark and then dabbed the blue and pink inks over top, before stamping it onto the cardstock - then it got a sprinkling of embossing powder, a shot of heat applied, and voila! a bright and sort-of sparkly butterfly. An embossing folder gave some dimension to the center panel, and a border punch added interest as well.
  I'm hoping to make a dent in my overflowing to-do quilt projects tomorrow night - it's FNSI again!
Saturday, May 19, 2012
A very productive evening!
It's been a while since I participated in the Friday Night Sew-In, so I thought I'd better make a valiant effort for last night's event.
 I had the center of this quilt done, using a Ruby jelly roll. I found a free online tutorial for a "strip tube" quilt, and thought it would be perfect for these bright cheerful fabric strips. The center has been done for about 5 weeks; I've been waiting for the pink border fabric to arrive so that I could finish the top. Thankfully, the mail carrier dropped a fat package into my mailbox yesterday - and there was my fabric! (It only took 4 weeks to get here from Tennessee...). I quickly got it washed, dried and pressed; cut the strips, sewed them on, and... (big sigh of relief), it's ready to sandwich with the batting and backing. The binding strips are cut, ready to sew together and then to complete the quilt after I get the quilting done.
Next up was my Super Zigzag quilt - another freebie on the internet. I had cut and sewn a few of the print/white fabric sections, before realizing that I'd also need to cut fabric triangles to finish off the rows. I had about 40 cm. of the fabric left, and a quick tour of my 5 "local" quilt shops were all in vain. Then a quilting friend mentioned that another friend was closing her online quilt shop, and her prices were really good - and there, amid all the other white tone-on-tone fabrics, was my white fabric!!! I ordered it right away, and 6 days later, my fabric was here from Wyoming (the state, not the s.w. Ontario town). It also got the wash, dry, pressing treatment; last night I finished making all of the blocks, and even got a few of the block strips partially sewn. I laid it out on the living room floor, to get a rough idea of how it will look when the center section is completely assembled. Now I'll get the triangles cut and maybe finish the top tonight yet.
I had the center of this quilt done, using a Ruby jelly roll. I found a free online tutorial for a "strip tube" quilt, and thought it would be perfect for these bright cheerful fabric strips. The center has been done for about 5 weeks; I've been waiting for the pink border fabric to arrive so that I could finish the top. Thankfully, the mail carrier dropped a fat package into my mailbox yesterday - and there was my fabric! (It only took 4 weeks to get here from Tennessee...). I quickly got it washed, dried and pressed; cut the strips, sewed them on, and... (big sigh of relief), it's ready to sandwich with the batting and backing. The binding strips are cut, ready to sew together and then to complete the quilt after I get the quilting done.
Next up was my Super Zigzag quilt - another freebie on the internet. I had cut and sewn a few of the print/white fabric sections, before realizing that I'd also need to cut fabric triangles to finish off the rows. I had about 40 cm. of the fabric left, and a quick tour of my 5 "local" quilt shops were all in vain. Then a quilting friend mentioned that another friend was closing her online quilt shop, and her prices were really good - and there, amid all the other white tone-on-tone fabrics, was my white fabric!!! I ordered it right away, and 6 days later, my fabric was here from Wyoming (the state, not the s.w. Ontario town). It also got the wash, dry, pressing treatment; last night I finished making all of the blocks, and even got a few of the block strips partially sewn. I laid it out on the living room floor, to get a rough idea of how it will look when the center section is completely assembled. Now I'll get the triangles cut and maybe finish the top tonight yet.
 Now I've got to go - have one more quilt top to finish tonight, if possible - and then I have to check for a card for someone having surgery this week - just want her to know that we'll be praying for her...


Sunday, May 13, 2012
A card or two...
I decided that I was going to treat myself this past Friday night! Two dear friends (and Stampin' Up consultants) hosted a card-making workshop and I joined them for a few hours. We ended up making 6 cards altogether - some very pretty and time-consuming, others quick and easy.
Here are 2 of the cards (I've already given one away, and the others are in my stash box).

 The top card is a center-fold card, embossed on the right-hand panel. The left panel has a crimped panel - you then stamp a sentiment on the large scalloped circle; stamp 6 flowers using the Triple Treat Flower stamp (which I later won!), and then, after cutting the centers of the flowers out of 3 of the flowers, you stack and assemble the flowers, which then are attached to the card roughly around the sentiment.
The second card looks complicated to make, but was actually quite easy, if you read the instructions! You need two CS panels, 2 pieces of designer paper, a length of baker's twine, a few circles, a template and mini brads. Attach the DP to the appropriate cardstock, wrap the twine around one panel, fasten those panels to the card. Then, stamp the image; using the template, punch holes around the dark circle, insert the brads, affix the sailboat circle, and attach it to the card. Add a sentiment, and you're good to go!
It was wonderful to get out for a fun evening - and I now have a few pretty cards to show for it!
The top card is a center-fold card, embossed on the right-hand panel. The left panel has a crimped panel - you then stamp a sentiment on the large scalloped circle; stamp 6 flowers using the Triple Treat Flower stamp (which I later won!), and then, after cutting the centers of the flowers out of 3 of the flowers, you stack and assemble the flowers, which then are attached to the card roughly around the sentiment.
The second card looks complicated to make, but was actually quite easy, if you read the instructions! You need two CS panels, 2 pieces of designer paper, a length of baker's twine, a few circles, a template and mini brads. Attach the DP to the appropriate cardstock, wrap the twine around one panel, fasten those panels to the card. Then, stamp the image; using the template, punch holes around the dark circle, insert the brads, affix the sailboat circle, and attach it to the card. Add a sentiment, and you're good to go!
It was wonderful to get out for a fun evening - and I now have a few pretty cards to show for it!


Saturday, April 14, 2012
Finally have some quilt-y pics!
Well, it's been a long time coming, but I finally have pictures of a quilt! I finished the top late last night, and hubby helped with the holding-up this morning so I could get a decent pic.
This is another quilt for my single-moms pile. I think I have 3 or 4 tops done now, and need 8 (I think). A few others are started - two of them are mystery projects.
What's that? You want to see this quilt? Oh, all right.....
This is one of my favourite patterns - it's called "Warm Wishes" and it goes together fairly quickly IF you keep the colours in the right order. I love these fabrics together! I chose the print fabric first (I fell in love with it at first sight!), and then chose the 3 fabrics for the striped blocks, using colours from the print fabric.
Now I need to go shopping - there's a Shop Hop going on today, and one of my daughters (a quilter too!) is taking me away! to 5 different shops. Last year we both won door prizes, so we did well - we'll see what today brings!
This is another quilt for my single-moms pile. I think I have 3 or 4 tops done now, and need 8 (I think). A few others are started - two of them are mystery projects.
What's that? You want to see this quilt? Oh, all right.....

This is one of my favourite patterns - it's called "Warm Wishes" and it goes together fairly quickly IF you keep the colours in the right order. I love these fabrics together! I chose the print fabric first (I fell in love with it at first sight!), and then chose the 3 fabrics for the striped blocks, using colours from the print fabric.
Now I need to go shopping - there's a Shop Hop going on today, and one of my daughters (a quilter too!) is taking me away! to 5 different shops. Last year we both won door prizes, so we did well - we'll see what today brings!
Monday, April 2, 2012
My latest cards...
I really haven't had any time in the last week or so to do any quilting, and it's been almost as difficult to find time to make a card - but I needed a few cards, so that's what I'm sharing today.
It was my dad's 83rd birthday on Friday, and I found a card design on-line that worked with his interests and my stamp sets - and here's my card for him:
The C/S is Old Olive and Chocolate Chip from Stampin' Up, and both of the DPs and stamp set (Lovely as a Tree) are as well.
The second card is for a couple from church - she's fighting cancer, and he's in a rehab facility after having had a stroke. I wanted to remind them that they're in my thoughts and prayers. I CASE'd this design from a friend, and even tried one of her favourite embellishments - Viva Pearls. I'm quite pleased with the end product!
The cardstock, designer paper and ribbon are all River Rock from Stampin' Up, and the butterfly die is as well. I had previously inked the raised side of an embossing folder, and then embossed a piece of white cardstock - that ended up becoming the butterfly!
Thanks for checking in!
It was my dad's 83rd birthday on Friday, and I found a card design on-line that worked with his interests and my stamp sets - and here's my card for him:

The C/S is Old Olive and Chocolate Chip from Stampin' Up, and both of the DPs and stamp set (Lovely as a Tree) are as well.
The second card is for a couple from church - she's fighting cancer, and he's in a rehab facility after having had a stroke. I wanted to remind them that they're in my thoughts and prayers. I CASE'd this design from a friend, and even tried one of her favourite embellishments - Viva Pearls. I'm quite pleased with the end product!

The cardstock, designer paper and ribbon are all River Rock from Stampin' Up, and the butterfly die is as well. I had previously inked the raised side of an embossing folder, and then embossed a piece of white cardstock - that ended up becoming the butterfly!
Thanks for checking in!
Saturday, March 24, 2012
Therapy Thursday
My LSS (Scrappin' Great Deals) is having a garage sale today, and I have lots of goodies to get rid of. I find that I'm spending a LOT more time quilting lately, and only manage to make cards when I absolutely need one - sad... Because of this, I find I keep going back to my favourite stamps, and other sets sit untouched. I figured that I might as well sell them - and then I'll have a store credit to buy stuff that I actually NEED!
So, I drove there Thursday to drop off my box of goodies, and I managed to time it perfectly - just in time for Therapy Thursday! Basically, you show up by 1 p.m., with your tools (scissors, tape, pop dots, etc.), and you come home with a great card!
Thursday's card was so cute! I have a quilting friend that's in a rehab facility after breaking her leg for the 2nd time in a year, and I wanted to send her a cheery card - and it couldn't have been better timing! We used a set that is a new concept (for me, at least!) - My Favorite Things now sells sets of stamps with the dies that you need to complete the card - and the card was exactly what I need for my friend! I'm sure you'll agree:

Saturday, March 17, 2012
... and this is what I did last night.
So, it was a good thing that I got a head-start on my project, because it definitely took a lot longer to make than I thought it would.
I found a really neat quilt pattern online a week or so ago - this should bring you to the tutorial: http://www.abrightcorner.com/2012/02/tutorial-strip-tube-quilt.html
I bought a Ruby jelly roll a few weeks ago, because I've always loved the colours, and I just wanted a really bright and fun quilt. So far, I'm right on track to accomplish that!
The pic shows the progression from individual blocks (some of them are like the positive/negative images that you get when you cut up the strips), to pairs, and then the start of 2 different rows...... (sorry the pic is so blurry)

Thursday, March 15, 2012
Anniversaries and other fun things....
One of my sisters (and her husband!) celebrated their 30th wedding anniversary this past week - and it called for a special card. It took 3 tries, but I finally came up with one that was acceptable enough (she's a card-maker too, so there are standards, you know...) I pulled together a few pieces of DP from an SU pack from a few years ago, and chose my pallette from that. A lacey oval from Spellbinders, and their initials and the #30 from a set of dies hubby gave me for Christmas a few years ago finished it all off.
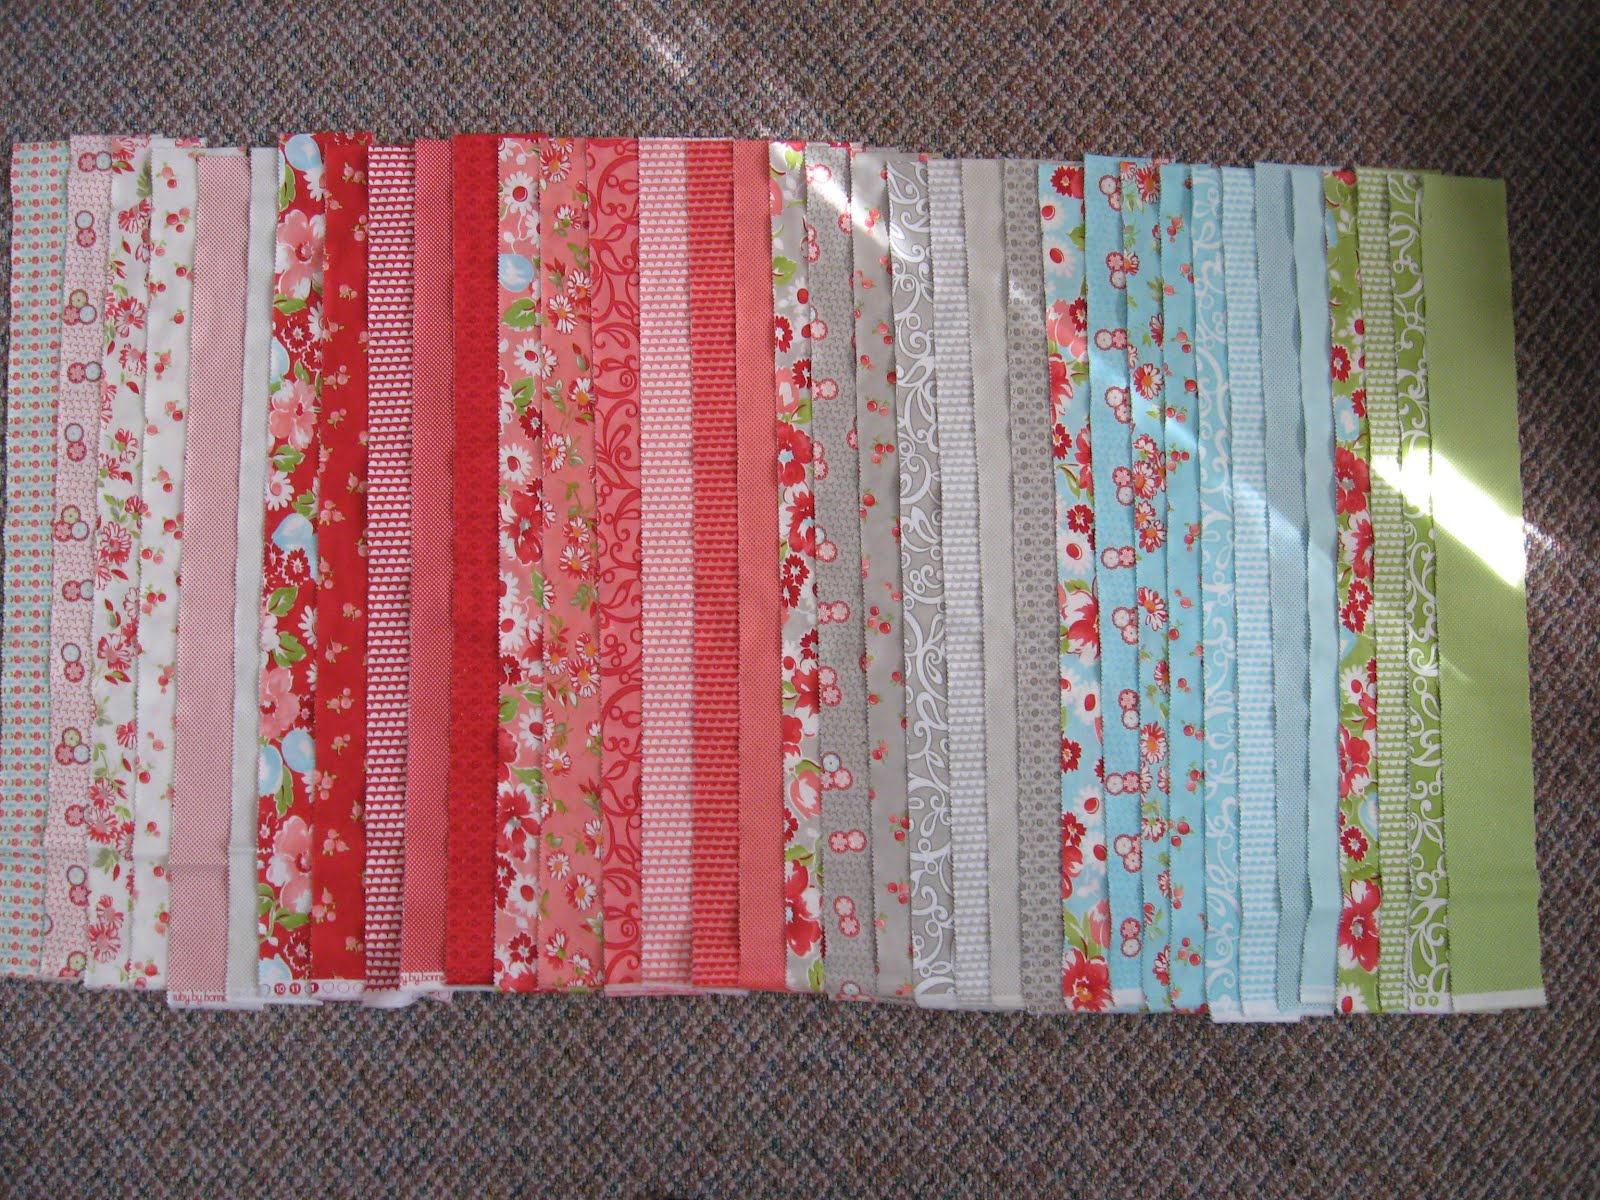
And, seeing that tomorrow is the March edition of Friday Night Sew-In, and I had a little bit of time, I figured that I'd get a head-start on my project. It wasn't too difficult - I've just started 3 new ones... Here's the fabrics in the Ruby jelly roll - I found a great tutorial online, and I'm going to be playing with that. Check back on Sat. to see what I've done.

And, seeing that tomorrow is the March edition of Friday Night Sew-In, and I had a little bit of time, I figured that I'd get a head-start on my project. It wasn't too difficult - I've just started 3 new ones... Here's the fabrics in the Ruby jelly roll - I found a great tutorial online, and I'm going to be playing with that. Check back on Sat. to see what I've done.
Thursday, March 8, 2012
Wish I didn't need these...

It's a fact of life that people that we know and love will eventually pass away. It just seems like that has happened far too often this past week...
I struggle making sympathy cards - I often don't know what to say, and a big hug communicates far more that a card can. Sometimes a hug is too difficult to deliver in person though, and then a card has to do the job.
This is one that I've made a few times - using a pretty piece of DP helps a lot! Then it's easy to make the card, choosing C/S from the colours in the paper. An SU punch, a Couture Creations embossing folder, some Nesties, a sentiment from SU and the card almost makes itself!
Now I'm off to find my address book...
Thursday, February 23, 2012
Not exactly what I was trying to do....
Okay, it's late Saturday evening, and I realize that I need a birthday card for a friend at church in the morning. Check the cards that I've already made - nothing there that's "right". So, quickly check a few blogs for inspiration, and I find a card! Grab some watercolour paper, some inks, a paintbrush and a bit of water. Stamp the large trees stamp from Lovely as a Tree on the watercolour paper. Smoosh the cover of the SU inkpads so they'll deposit ink onto the cover. Open the pad, wet the brush, dip the brush into the ink on the cover, and paint in the sky. So far, so good... well, mostly good (I wanted to sponge clouds, but I couldn't find my stencil). Give the "paint" a chance to dry. Clean the brush; wet it again, and repeat the smooshing technique with green ink. Start to "paint" the trees - and then it happens - the water-based ink that I used to stamp the image is starting to smudge - rats! Wait, it's not as bad as I thought - it actually looks a bit like an impressionist painting! Now, I'm not an artist by any stretch of the imagination, but I think this will pass. I painted in some grass too; glued on some ribbon, put the panel on the card, add a few rhinestones, and it's done!

Saturday, February 18, 2012
The First 12
I have had next to no sewing time at all lately, so I was really looking forward to the latest Friday Night Sew-In. I didn't get too much accomplished, but I did manage to make a few more Dresden plate blocks for the Scrappy Plate Club quilt-along from Bunny Tales. I had already finished 4 or 5 plates, so I now have 12! (Maybe I accomplished more than I first thought!) I'm planning to make more than the 12 called for in the quilt-along, so I'm well on the way with that. February's step is to make the center sections, so I'm behind with that step... I'm still trying to decide if I want to make the centers scrappy or all one colour - and if I go that route, what colour should I use? Black would make all the colours pop, but the quilt is going to a teen mom, and I'm not sure that I want to go that route. Decisions, decisions!
Now comes the best part - the picture:
This isn't the final layout - just wanted to give you a rough idea of what it could look like!
Now comes the best part - the picture:

This isn't the final layout - just wanted to give you a rough idea of what it could look like!
Thursday, January 26, 2012
Final "After Christmas Sew Along"
This week marks the end of the After Christmas Sew Along. I loved having one day set aside every week to sew - and even though I might have other days to get behind the machine, this one was sort of carved in stone.
I was hoping to have the whole day to work on my latest Work In Process (WIP) - the Scrappy Dresden Plate quilt-along. I had bought the ruler and cut and sewn a few strips to try out the Dresden Plate pattern before Christmas, and even though I wasn't sure I was going to take part, I couldn't pass it up. Sew, the plan was to work at making the 12 plates that I needed for the January installment - and then the phone rang. My mom is pretty seriously ill, and my sis needed me to help out, so that meant the end of my day-long sewing adventure. I did manage to finally get some stitching and even the pressing done, and parts of 3 different plates sewn together.
There's not a lot to show for it, but I figure I can sew most any day - but my mom's not going to be here forever, and she's definitely MUCH more important!
I do have a picture or two of my progress - check out the pile of sewn parts, and some of them pressed and ready to sew:


Subscribe to:
Posts (Atom)